
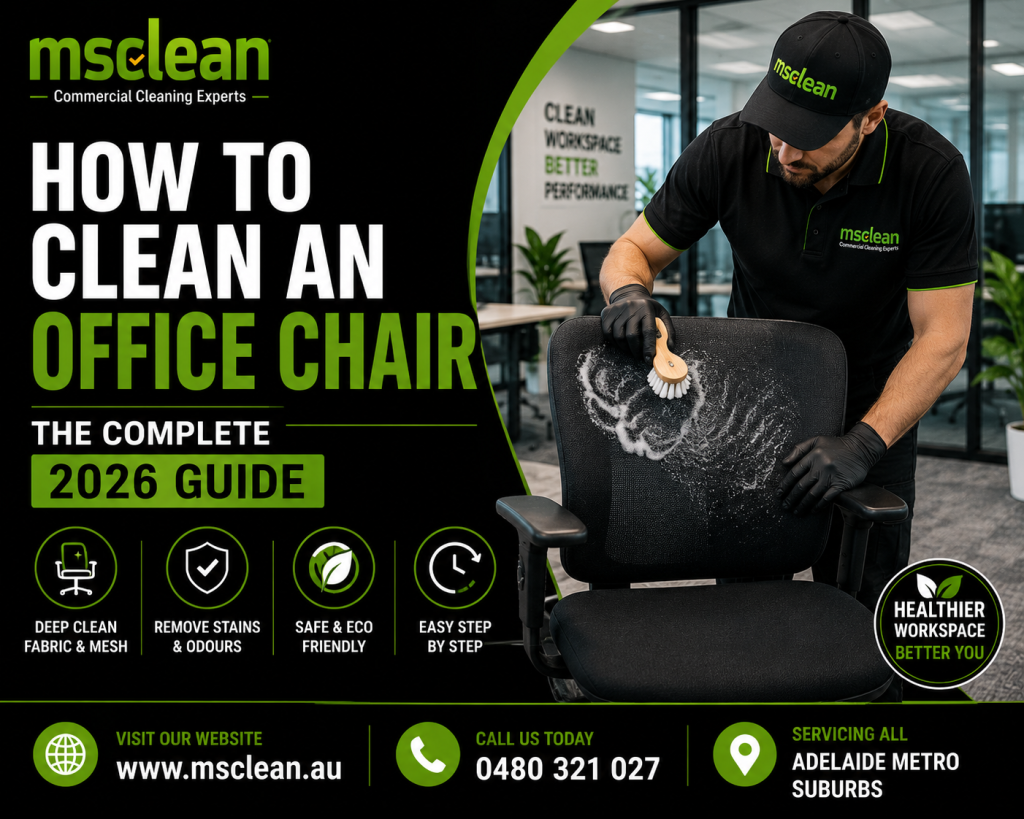
How do you clean an office chair?
To clean an office chair, start by checking the upholstery tag for the cleaning code — W (water-safe), S (solvent only), WS (both) or X (vacuum only). Vacuum the entire chair first to remove loose debris. Then clean the fabric, mesh or leather using the correct method for your material. Spot-treat stains with an appropriate cleaner, wipe down all hard surfaces including armrests and the chair base, and clean the wheels last. Allow the chair to dry fully before sitting in it. Most office chairs need a basic clean monthly and a deep clean every three to six months.
Office chair cleaning requires a material-specific approach because fabric, mesh, leather and vinyl respond differently to cleaning products and moisture. The first step before any cleaning is identifying the upholstery cleaning code on the chair tag — W indicates water-based cleaners are safe, S indicates solvent-only products, WS allows both, and X means vacuum only with no liquid cleaners. Applying the wrong product can cause permanent fabric damage, shrinkage or colour loss. Most office chairs need monthly light maintenance and a quarterly deep clean to prevent bacteria, allergen and odour build-up from daily use.
You clean your desk. You clean your monitor. You clean your keyboard.
But your office chair — the thing that carries your full body weight for eight hours a day — probably has not had a proper clean since you set it up.
Think about what your chair absorbs every single day. Body heat. Sweat. Skin oils. Food crumbs. Coffee splashes. Dust from the air settling into the fabric. All of it goes into the chair cushion and never comes out unless you actually clean it.
The result? A chair that smells slightly off, looks duller than it should, feels slightly sticky in summer, and harbours more bacteria per square centimetre than most surfaces in your office.
The good news: cleaning an office chair is not complicated. You just need to know the right method for your chair’s material — and that is exactly what this guide covers.
Start Here Before You Touch a Single Cleaning Product
Most people grab a damp cloth and start scrubbing. This is how chairs get ruined.
Before you use any cleaning product on your office chair, do one thing first. Find the upholstery tag. It is usually attached underneath the seat cushion or along the bottom of the chair back.
The tag shows a cleaning code. This code tells you exactly what products are safe to use on that fabric.
The four upholstery cleaning codes:
| Code | What It Means | What to Use |
| W | Water-based cleaners are safe | Mild dish soap and water, upholstery shampoo |
| S | Solvent-based cleaners only | Dry-cleaning solvent, no water |
| WS | Either water or solvent-based cleaners | Most commercial upholstery cleaners |
| X | Vacuum only — no liquid cleaners | Brush and vacuum, professional cleaning only |
Why this matters so much:
Apply water to an S-coded fabric and you risk permanent watermarks, fabric shrinkage or colour loss. Apply a solvent to a W-coded fabric and you may damage the fibre structure. Skip this step and you are guessing — and guessing wrong can cost you a replacement chair.
If your chair has no tag, treat it as W/S and patch-test any product on a hidden area — underneath the seat edge — before applying it to a visible surface.
What You Need Before You Start
Gather everything before you start cleaning. Stopping mid-clean to hunt for supplies means wet fabric sitting without attention, which leads to watermarks.
For fabric office chairs:
- Vacuum with upholstery brush attachment
- Microfibre cloths (at least three — one for cleaning, one for rinsing, one for drying)
- Mild dish soap or upholstery cleaner
- Warm water in a small bowl
- Baking soda (for odour)
- Soft-bristle brush or old toothbrush for stubborn spots
For mesh office chairs:
- Vacuum with brush attachment
- Microfibre cloth or soft sponge
- Mild dish soap and warm water
- Old toothbrush for mesh crevices
- Compressed air (optional but very effective)
For leather office chairs:
- Vacuum with soft brush attachment
- Leather cleaner or a few drops of dish soap in distilled water
- Separate leather conditioner
- Two lint-free microfibre cloths
- Cotton swabs for seams and stitching
For vinyl office chairs:
- Mild all-purpose cleaner or dish soap and water
- Microfibre cloth
- Old toothbrush for seam areas
For all chair types:
- Disinfectant spray or wipes (for hard surfaces — armrests, base, wheels)
- Compressed air or toothpick for wheel debris
- Lubricant spray for squeaky mechanisms
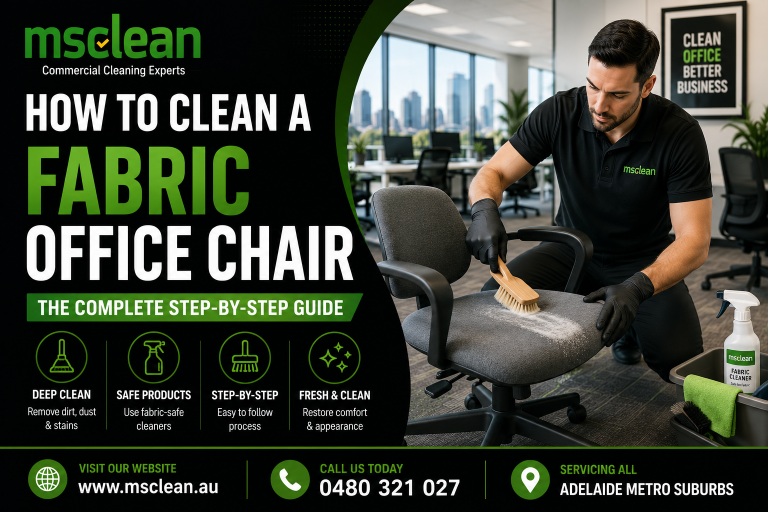
How to Clean a Fabric Office Chair
Fabric chairs are the most common type and the most forgiving to clean — as long as you do not over-wet them.
Step 1: Vacuum thoroughly first
Attach the upholstery brush head to your vacuum and go over the entire chair — seat, back, armrests and any crevices. Work the brush into seams and fold lines where dust and crumbs accumulate. This step removes the dry debris that turns into muddy residue the moment you add any liquid.
Step 2: Apply baking soda for odour
Sprinkle a light, even layer of baking soda over the fabric surfaces. Let it sit for 15 to 20 minutes. Baking soda absorbs body odour and sweat compounds from deep in the fibres. Vacuum it off completely. This single step makes the biggest difference to smell, and most cleaning guides skip it entirely.
Step 3: Prepare your cleaning solution
Mix one teaspoon of mild dish soap into one cup of warm water. Stir gently — you want a solution, not foam. Too much soap creates residue that attracts more dirt once the chair dries.
Step 4: Clean the fabric
Dip a microfibre cloth into the solution and wring it out thoroughly. The cloth should be damp, not wet. A wet cloth saturates the foam padding underneath, which creates a mildew risk. Work in small sections, using gentle circular motions. Change to a clean section of cloth frequently to avoid redistributing dirt.
Step 5: Rinse
Use a second clean cloth dampened with plain water — no soap — to wipe over the cleaned areas. This removes soap residue that can cause the fabric to attract more dirt faster after cleaning.
Step 6: Dry the chair
Open windows or turn on a fan and direct it at the chair. Do not sit in the chair until it is completely dry — usually two to four hours depending on how much moisture was applied and the ambient conditions. Sitting in a damp chair restores the sweat problem you just cleaned out.
For stubborn fabric stains: Apply undiluted upholstery cleaner directly to the stain. Let it dwell for five minutes. Blot — never scrub — working from the outside of the stain inward to prevent spreading.
How to Clean a Mesh Office Chair
Mesh chairs collect dust differently from fabric ones. Dust, skin cells and debris fall through the mesh and accumulate inside the frame structure. Standard wiping only addresses the surface.
Step 1: Start with compressed air
Hold a can of compressed air six to eight centimetres from the mesh and blow across the surface. This dislodges debris trapped inside the mesh structure that a vacuum cannot reach. Do this outdoors or near an open window — the dust cloud is significant.
Step 2: Vacuum the mesh
Use the upholstery brush attachment to vacuum both the front and back surfaces of the mesh back and seat. Work the brush gently — pressing too hard can distort the mesh fibres.
Step 3: Scrub with mild soap solution
Mix a small amount of dish soap into warm water. Dampen a soft sponge or microfibre cloth and wipe across the mesh surface using light pressure. For the most effective result, use an old toothbrush with the soap solution on stubborn areas and any mesh-to-frame junction points where grime builds up.
Step 4: Rinse carefully
Wipe over the mesh with a clean damp cloth to remove all soap residue. Soap left in mesh fibres attracts dust faster and can cause the mesh to feel stiff.
Step 5: Air dry completely
Mesh dries faster than fabric because air flows through it. Thirty to sixty minutes with a fan directed at the chair is usually sufficient. Never use a hairdryer — direct heat can distort or shrink mesh fibres permanently.
Mid-Content Hook
Here is something most people discover the hard way. The armrests on your office chair carry more bacteria than the seat does.
Your hands touch the armrests hundreds of times a day. You touch the armrests after eating, after using your phone, after handling documents, after coming in from outside. The armrests never get cleaned because they do not look dirty.
Do not forget the armrests. We cover them in Section 7.
How to Clean a Leather Office Chair
Leather requires a specific routine. The wrong product dries leather out, cracks the surface, or strips the protective finish. Do this correctly and leather lasts for decades. Do it wrong and it deteriorates visibly within a year.
Step 1: Check the leather type
Full-grain and top-grain leather are genuine leather — they respond well to specialist leather cleaners and conditioners. Bonded leather (sometimes labelled as “PU leather” or “faux leather”) is a synthetic product that behaves differently and does not respond well to conditioning. Check the product tag or manufacturer information to identify which type you have.
Step 2: Vacuum gently
Use the soft brush attachment on your vacuum — never a stiff brush. Work along seams and piping to remove dust and crumbs without scratching the leather surface. Keep the suction on a medium setting.
Step 3: Clean the leather
Apply a small amount of dedicated leather cleaner to a lint-free microfibre cloth — never directly onto the leather surface. Work in small sections using gentle circular motions. Alternatively, use a solution of a few drops of mild dish soap in distilled water (not tap water — the minerals can leave marks) for a basic clean.
Step 4: Wipe dry immediately
Use a second dry cloth to remove all moisture from the surface. Leather should never remain wet — water sitting on leather causes staining and can start to break down the surface finish.
Step 5: Apply leather conditioner
This step separates people who maintain their leather chairs from people who replace them. Apply leather conditioner every one to three months. It replenishes the natural oils that daily use, office air conditioning and sunlight strip from the leather. A conditioned leather chair stays supple, resists cracking and looks significantly better for far longer.
Do not skip conditioning. It costs $15 and takes five minutes. Skipping it costs you a chair in three years.
How to Clean Vinyl and Faux Leather Office Chairs
Vinyl and faux leather clean up more easily than genuine leather and are far more water-tolerant. However, they need consistent cleaning because oils and sweat from skin contact accelerate surface degradation over time.
Step 1: Wipe down with mild solution
Mix a small amount of mild all-purpose cleaner or dish soap with warm water. Wipe across all vinyl surfaces with a damp microfibre cloth. Vinyl tolerates more moisture than fabric or leather, but never soak it.
Step 2: Address seams with a toothbrush
The seams and stitching in vinyl chairs trap oils and dark residue that a cloth cannot reach. Dip an old toothbrush in your cleaning solution and work it gently along every seam. Wipe off the loosened debris with a clean cloth immediately.
Step 3: Disinfect
Vinyl is the easiest chair material to disinfect because most commercial disinfectant wipes are safe on its surface. Wipe down all seating surfaces with a disinfectant wipe, let the surface remain wet for the dwell time on the product label, then wipe dry.
Step 4: Dry and protect
Wipe all surfaces dry with a clean cloth. A light application of vinyl protectant (available at automotive supply shops — the same products used on car interiors work well on office furniture vinyl) helps maintain the surface finish and prevents cracking from dryness.
Cleaning the Parts Everyone Forgets
Armrests
Armrests carry the highest bacterial load of any surface on an office chair. The armrests of task chairs harbor significant bacteria from hands. Disinfect them daily.
For plastic or hard vinyl armrests, wipe with a disinfectant wipe every day. For padded armrests, use your material-appropriate cleaner from the sections above and let them dry fully before use.
Chair base and column
The base and central column of most office chairs accumulate scuff marks from shoes, dust from floors and grime from the surrounding area. Wipe the entire base with a damp cloth and a small amount of all-purpose cleaner. For chrome bases, use a small amount of glass cleaner on a cloth — it brings the shine back immediately.
Wheels and casters
Wheels are the single most neglected part of office chair maintenance and the part most likely to cause hygiene issues on your floor.
Flip the chair upside down or lay it on its side. You will almost certainly find a significant build-up of hair, carpet fibres and debris wrapped around each wheel axle.
Use a seam ripper, scissors or a toothpick to cut and pull debris free from around the wheel axles. Wipe the wheel housings with a damp cloth. Apply a small spray of silicone lubricant to each wheel axle to restore smooth rolling.
Clean wheels roll quietly and smoothly and stop tracking visible dirt lines across your floor.
Gas cylinder and tilt mechanism
The plastic-covered gas cylinder and the underside of the seat mechanism accumulate greasy dust. Wipe these with a damp cloth. If the tilt mechanism squeaks, apply a small amount of lubricating spray to the moving joints.
How to Disassemble an Office Chair for Deep Cleaning
Some deep cleaning jobs need the chair partially disassembled to reach everything properly. Here is the standard process for most office chairs.
Removing the casters/wheels
Most office chair casters pull straight out from the base legs with firm upward pressure. Hold the base leg firmly and pull the caster wheel directly upward. It should release after a small amount of force. Reinsert by pushing straight down until you hear a click.
Removing the gas cylinder and base
Flip the chair upside down. The gas cylinder connects the seat mechanism to the five-star base. In most chairs, the cylinder fits into the base with a tapered post — it holds by friction only. Lay the chair on its side, hold the base and pull the cylinder free with firm steady pressure. If it is stubborn, a rubber mallet tapped around the cylinder tube helps loosen it without damaging anything.
Removing the seat cushion
Many office chairs have a seat cushion secured with screws from underneath the seat mechanism. Turn the seat upside down and locate the screws — usually four corner screws through the metal plate. Remove these and the cushion separates from the mechanism. Some chairs have a clip-in cushion that releases by pressing tabs on the underside.
Removing the armrests
Armrests are typically secured by two or four bolts on the underside of the seat. Remove the bolts and the armrests lift away. Keep the hardware in a small container so nothing gets lost.
Reassembly tip: Photograph the chair from multiple angles before disassembling if you are doing this for the first time. The photo takes five seconds and saves thirty minutes of confusion during reassembly.
How to Clean Dining Chair Cushions Using the Same Method
The same principles that apply to office chair fabric apply directly to dining chair cushions. The main difference is that dining chair cushions often face grease and food spills rather than the sweat and skin oil profile of an office chair.
For dining chair cushions with removable covers: Remove the cover and check the washing label. Most zippered dining chair cushion covers are machine washable on a gentle cycle in cold water. Air dry only — tumble drying often causes shrinkage or distortion.
For dining chair cushions without removable covers: Follow the fabric office chair cleaning method above. Check the upholstery code if there is a tag. Apply the baking soda treatment first to absorb food odours. Use a stronger upholstery cleaner for grease spots — a small amount of dish soap applied directly to a grease stain, worked in with a toothbrush and then blotted out, removes most food grease effectively.
For outdoor dining chair cushions: These typically use polyester outdoor fabric. They tolerate more water and can be cleaned with a garden hose and a scrub brush with a mild soap solution. Rinse thoroughly and allow them to dry flat in the sun.
Office Chair Maintenance Schedule and When to Call a Professional
Most office chairs fail early not because of heavy use but because of no maintenance. Here is the schedule that keeps any chair in good condition for its full intended lifespan.
Weekly tasks — takes 5 minutes
- Wipe armrests with a disinfectant wipe
- Vacuum seat surface with upholstery attachment
- Check wheels for hair and debris accumulation
- Spot-treat any fresh stains immediately — fresh stains take two minutes to remove, set stains take twenty
Monthly tasks — takes 20 to 30 minutes
- Full fabric, mesh or leather clean as per the relevant section above
- Wipe down base, column and all hard surfaces
- Clean wheels and apply silicone lubricant
- Apply leather conditioner if applicable
- Check and tighten any loose bolts on armrests, seat mechanism or base
Quarterly tasks — takes 45 to 60 minutes
- Full disassembly and deep clean of all components
- Baking soda odour treatment of all fabric surfaces
- Check gas cylinder operation — if the chair is sinking unexpectedly, the cylinder needs replacement
- Check all moving mechanism points and lubricate
- Assess whether any part needs replacement
When to call a professional cleaner
Some situations need professional equipment and products rather than household cleaning methods.
Call a professional when:
- The chair has a persistent smell that does not improve after a home clean — this usually means odour compounds have penetrated the foam padding itself, which requires extraction equipment
- The chair has a large or widespread stain in S-coded fabric — water will make this worse
- The chair has been affected by mould or mildew — professional treatment prevents spore spread
- The chair is a high-value piece (genuine leather executive chair, designer ergonomic model) — the replacement cost justifies professional care
Ms Clean provides professional office chair and upholstery cleaning across office cleaning Adelaide. We use commercial-grade extraction equipment that removes embedded odours, allergens and stains from the foam cushion level — not just the surface. For offices with multiple chairs or high-value pieces, professional cleaning every six to twelve months extends chair life significantly and maintains a professional workspace standard.
FAQs — How to Clean an Office Chair
Q1. How do you clean a fabric office chair?
Start by checking the upholstery tag for the cleaning code — W means water-based cleaners are safe, S means solvent only. Vacuum the entire chair thoroughly, then sprinkle baking soda on all fabric surfaces and let it sit for 15 minutes before vacuuming it off. Mix a teaspoon of mild dish soap with warm water, dampen a microfibre cloth — not wet, just damp — and clean the fabric in circular motions. Rinse with a clean damp cloth to remove soap residue and allow the chair to air dry completely before sitting in it. Spot-treat specific stains with undiluted upholstery cleaner, blotting rather than scrubbing.
Q2. What are the best ways to clean an office chair?
The best approach depends on the chair material. For fabric, use a mild soap and water solution after checking the upholstery code. For mesh, combine compressed air, gentle vacuuming and a soft sponge with mild soap. For leather, use a dedicated leather cleaner followed by conditioner. For vinyl, a mild all-purpose cleaner and a disinfectant wipe work well. Regardless of material, always vacuum first to remove dry debris, always patch-test any cleaning product on a hidden area before using it on visible surfaces, and always allow the chair to dry completely before use.
Q3. What is the best way to clean a mesh chair?
Start with compressed air to dislodge debris trapped inside the mesh structure — this step makes every other step more effective. Vacuum both sides of the mesh surface with a brush attachment. Then use a soft sponge dampened in a mild dish soap solution to clean the mesh in gentle, even strokes. Work an old toothbrush along the mesh-to-frame joints where grime accumulates. Rinse with a clean damp cloth to remove all soap residue. Air dry with a fan — mesh dries within 30 to 60 minutes and never needs a hairdryer, which can permanently distort the fibres.
Q4. How do I properly maintain and clean office chairs?
Proper office chair maintenance follows a weekly, monthly and quarterly schedule. Weekly: wipe armrests with a disinfectant wipe, vacuum the seat, check wheels for debris. Monthly: full material-appropriate clean of all upholstered surfaces, wipe down all hard components, clean and lubricate wheels. Quarterly: disassemble the chair to access all components, deep clean all surfaces, check and tighten all mechanical connections, apply leather conditioner if applicable. Immediate action on spills prevents 90 percent of permanent stains — blot the spill immediately with a dry cloth before applying any cleaning solution.
Q5. How can I maintain my mesh ergonomic office chair?
Maintain a mesh ergonomic chair by vacuuming the mesh weekly to prevent dust and skin cell build-up from embedding deep in the fibres. Clean the mesh monthly with a mild soap solution using a soft cloth, paying specific attention to the lumbar support area and headrest if present — these receive the most direct contact from your body. Check all mechanical adjustment points — seat height, lumbar support, armrest height — for smooth operation and apply a small amount of lubricant to any mechanism that moves with resistance. The mesh itself should never feel stiff or rough — if it does, residual soap from previous cleaning is the most likely cause.
Q6. In what ways can I disassemble an office chair?
Most office chairs disassemble at four points. First, the casters pull straight out from the base legs with firm upward pressure. Second, the gas cylinder separates from the five-star base by turning the chair upside down and pulling with steady pressure — the cylinder holds by friction only. Third, the seat cushion usually attaches to the seat mechanism with four screws on the underside. Fourth, armrests typically attach with two to four bolts visible from the underside of the seat. Photograph the chair before starting and keep all hardware in a small bowl during the process. Full disassembly is rarely needed for routine cleaning — it is most useful for a quarterly deep clean or when replacing individual components.
Q7. How do you clean dining chair cushions?
If the dining chair cushion has a removable cover, check the washing label and machine wash on a gentle cycle in cold water if permitted — air dry only. For fixed cushions without removable covers, treat them exactly like a fabric office chair. Check the upholstery code if a tag is present. Vacuum first, then apply baking soda to absorb food odours for 15 minutes before vacuuming off. For grease spots from food — the most common dining chair stain — apply a small amount of undiluted dish soap directly to the stain, work it in with an old toothbrush using gentle circular motions, and blot away with a clean damp cloth. Never scrub a grease stain — scrubbing spreads it into the surrounding fabric.
Q8. How do you clean, maintain, and care for your office chair?
Comprehensive office chair care combines daily, weekly and monthly habits. Daily: wipe armrests with a disinfectant wipe. Weekly: vacuum the seat and back. Monthly: full clean of all upholstered surfaces using the method appropriate to your chair material, plus cleaning the wheels, base and all hard components. Quarterly: deep clean with partial disassembly, odour treatment and mechanism lubrication. For leather chairs, apply conditioner every one to three months — this is the single most important maintenance step for extending the life of a leather chair. The most damaging habits are sitting on a damp chair after cleaning, ignoring spills until they set, and using the wrong cleaning product for the material type.
Actionable Takeaways
Before you close this guide, here are the five things to do today.
- Find your upholstery tag — flip your chair over and check the cleaning code. This single step prevents the most common DIY cleaning mistake.
- Buy baking soda if you don’t have it — it costs $2, removes sweat odour from fabric chairs better than any commercial spray and takes 15 minutes.
- Clean your wheels — flip your chair over and look at the wheel axles. If you find the mess that is almost certainly there, clear it today.
- Wipe your armrests right now — grab a disinfectant wipe and do this while you are still reading. It takes 30 seconds.
- Set a monthly reminder — a chair cleaned monthly takes 20 minutes. A chair ignored for two years takes 60 minutes and may not fully recover. The maintenance investment is worth it.
The Professional Option
Some chair cleaning jobs need commercial equipment rather than household products. If your chair has a persistent odour that survives a thorough home clean, a widespread stain in S-coded fabric, or signs of mould or mildew, professional cleaning is the right choice.
Ms Clean provides professional upholstery and office chair cleaning across Adelaide. We use hot water extraction equipment that removes embedded odours, allergens and stains from the foam cushion level — not just the surface fibres. For offices with multiple chairs or high-value ergonomic pieces, a professional clean every six to twelve months maintains a genuinely hygienic workspace and extends chair life significantly.
Call Now
Ms clean Au
Address: 71 Alexandra Street, Prospect, SA-5082
M : 0480 321 027
E-Mail: contact@msclean.au