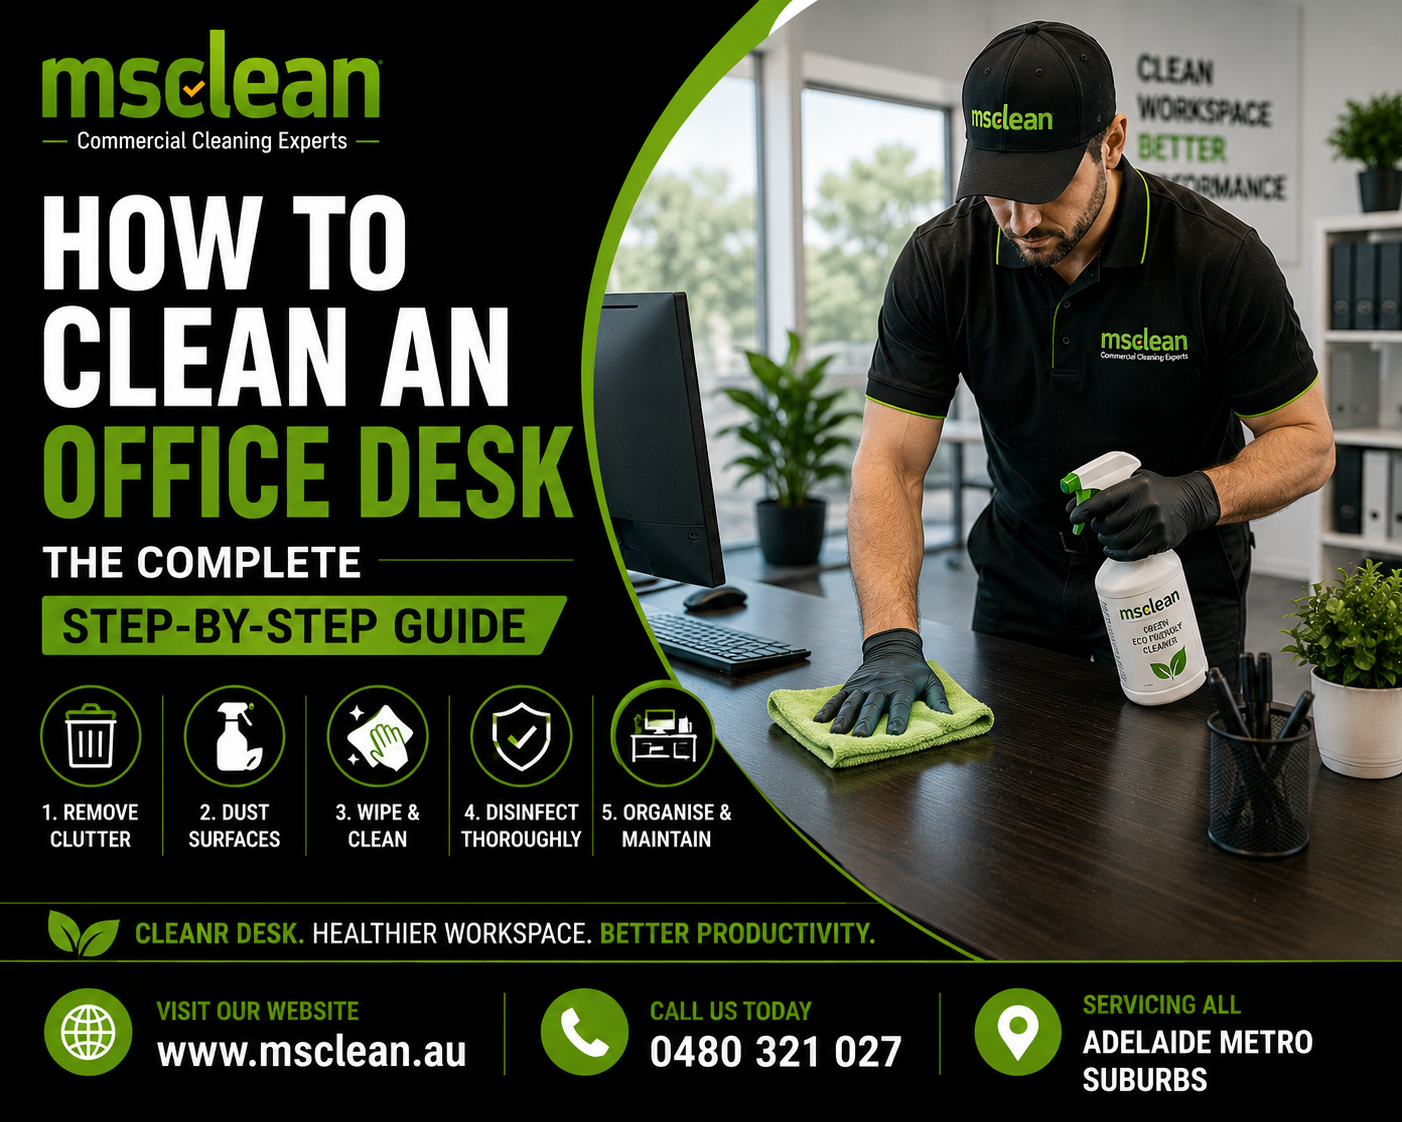
You clean an office desk by first clearing everything off the surface, then dry-dusting with a microfibre cloth to remove loose debris, followed by wiping the entire surface with a cleaning solution matched to your desk material — mild dish soap and water for wood, diluted white vinegar or glass cleaner for glass, and a disinfectant wipe for laminate and modern finishes. You clean the drawers, legs, and under-desk surfaces last. The whole process takes about 10–15 minutes for a standard desk and produces a genuinely clean surface not just a tidy one.
Keeping your desk clean and tidy not only improves aesthetics but also boosts productivity. Studies on office hygiene consistently show that the average office desk carries significantly more bacteria per square inch than a toilet seat — because desks get used constantly and cleaned rarely, while toilets get cleaned regularly. The right cleaning approach depends on your desk material. Wood needs moisture control and gentle cleaners. Glass needs ammonia-free, streak-free products. Modern laminate or fiberboard desks need protection from harsh chemicals. The golden rule for all surfaces is to apply cleaners to the cloth rather than directly onto the desk — and to always use a microfibre cloth to avoid scratches.
Think about everything that has happened at your desk today.
You drank a coffee there. You ate lunch there — or at least a handful of something. You touched your phone, then your keyboard, then your face. Your colleague stopped by and rested their hands on the corner while you had a conversation. Someone sneezed somewhere in the room.
Your desk is not just a work surface. It is a collection point for every piece of bacteria, dead skin, food residue, and airborne particle that has come within arm’s reach of you today. Research consistently shows that office desks carry significantly more bacteria per square centimetre than a bathroom floor — not because offices are dirtier places, but because desks get used constantly and almost never get cleaned properly.
The good news is that a clean desk is not hard to achieve. It takes about 10 minutes when you do it regularly and the right products for your desk material. This guide gives you the exact steps, the right products for every desk type, tips for keeping it cleaner for longer, and the daily habits that make the whole thing much easier than it sounds on a Monday morning.
Why Cleaning Your Office Desk Actually Matters
Most people clean their desk when it looks dirty. By then, the desk has already been doing something more concerning than looking untidy — it has been harbouring and transferring bacteria to your hands, your food, and your face for weeks.
Office desks are hotspots for germs and bacteria, particularly in shared office spaces. Regular cleaning helps reduce the spread of illnesses. The surfaces you touch most — keyboard, mouse, phone handset, and the desk surface itself — accumulate bacteria from hand contact, respiratory droplets, food residue, and skin cells every single day.
Beyond hygiene, there are practical reasons that most people underestimate.
A clean desk helps you think more clearly. Visual clutter competes for your attention. Every object on your desk that does not relate to the task you are currently working on is a small cognitive distraction. People who clear their desk before starting a focused task consistently report better concentration and fewer interruptions to their workflow.
A clean desk protects your equipment. Dust that accumulates inside keyboard keys, around monitor vents, and in phone speaker grilles shortens the life of the equipment and affects performance. A regular desk clean removes the particulate before it causes damage.
A clean desk makes a strong impression. Whether you work in a client-facing environment or alongside colleagues, a clean, organised desk communicates professionalism and respect for the shared workspace. A clean desk reflects professionalism and contributes to the overall office environment.
What You Need Before You Start Cleaning Your Desk
Gather everything before you start. Stopping halfway through to find a product or cloth undoes the efficiency of the process.
For all desk types:
- 2–3 clean microfibre cloths — one for dusting, one for applying cleaning solution, one for drying
- A soft-bristled brush or compressed air — for getting into keyboard crevices and cable channels
- A small bowl for cleaning solution, or a spray bottle
- Bin bag or waste basket within reach
For laminate or modern desks:
- Disinfectant wipes or spray — any standard office disinfectant
- Mild dish soap and warm water solution for general cleaning
For wooden desks:
- Mild dish soap diluted in warm water
- Furniture polish or beeswax polish for conditioning after cleaning
- Avoid bleach, ammonia, and acidic products — these damage the wood finish
For glass desks:
- Ammonia-free glass cleaner — ammonia can damage glass coatings
- A second dry microfibre cloth specifically for buffing the glass streak-free
For electronics on the desk:
- Screen-safe cleaner for monitors
- Isopropyl alcohol (70%) on a cloth for keyboards, mice, and phone handsets
- Compressed air for blowing debris from between keyboard keys
When it comes to how to clean an office desk, put cleaners on the cloth rather than directly on the desk. Always use microfibre cloths to avoid scratches.
How to Clean an Office Desk — Step by Step
This is the core process that works for every desk type. The material-specific instructions come in Section 4. Follow this sequence every time.
Step 1 — Clear Everything Off the Surface
Before you clean your desk, clear off any papers, knick-knacks, and other objects cluttering the surface. Having a clear workspace makes it easier to clean without things getting in the way.
Move your monitor, keyboard, mouse, phone, notebooks, pens, and anything else sitting on the desk surface to one side — off the desk entirely if possible. Do not just push things into a pile in one corner. You need access to the entire surface.
While you are at it, take a moment to sort what you put back. Keep what you use every day on the desk. File, store, or bin everything else. This is not just tidying — it directly affects how quickly your desk gets dirty again, because objects create dust traps.
Step 2 — Sort and File Your Papers
The first step to cleaning your desk is sorting through the various pieces of paper that may have accumulated on top of it. Separate important paperwork into categories and make folders for each one. Place them in a designated spot in a desk drawer or file cabinet.
A paper pile on a desk is one of the most common sources of desk clutter — and one of the easiest to manage if you handle papers once rather than moving them from pile to pile. The rule most productive people follow is simple: when a piece of paper lands on your desk, decide immediately whether it needs action, filing, or the bin. Do not put it in a pile to decide later.
Step 3 — Dry Dust the Entire Surface First
Begin with dry dusting. Use a microfibre cloth to sweep every inch of the surface, collecting loose dust and crumbs as you go. Pay attention to the corners and where cables go, as dust can pile up here. This dry dusting keeps you from pushing wet dirt around in the next step.
Wipe the full desk surface with a dry microfibre cloth — top, sides, and front panel if accessible. Move from one end to the other in smooth, overlapping strokes. Fold the cloth regularly so you are always using a clean section.
Dry dusting before applying any cleaning solution is a step many people skip — and it makes a noticeable difference to the result. If you wet-wipe a dusty surface without dusting first, you spread the dust into a film rather than removing it.
Step 4 — Clean the Surface with the Right Solution
Apply your chosen cleaning solution to a clean microfibre cloth — not directly onto the desk. Wipe the entire surface in overlapping strokes, working from the back to the front so you push debris toward you rather than into areas you have already cleaned.
Pay particular attention to:
- The area directly in front of where you sit — the most-used surface zone
- The edges and corners where dust accumulates against raised lips or cable channels
- The area around your monitor base where cables rest on the surface
- The drawer handles and pull edges — one of the most-touched and least-cleaned surfaces on any desk
Step 5 — Clean the Drawers
Open each drawer, empty it completely, wipe the interior with a damp cloth, and dry it before putting items back. Most people never empty their drawers to clean them — which means they accumulate crumbs, dust, and general debris for years.
While the drawer is empty, take 60 seconds to decide whether everything going back into it belongs there. Drawers that hold everything become drawers where nothing can be found.
Step 6 — Clean Your Electronics
Your keyboard, mouse, and phone handset carry more bacteria than almost any other surface in your office. We recommend applying some of the easier steps, such as disinfecting your keyboard and mouse, on a bi-weekly basis.
Keyboard: Turn it upside down and tap gently to dislodge loose debris. Use compressed air between the keys. Wipe the key surfaces with a cloth dampened with 70% isopropyl alcohol. The alcohol evaporates quickly and does not damage the electronics.
Mouse: Wipe all surfaces with an isopropyl alcohol cloth, including the bottom sensor area and the scroll wheel.
Phone handset: The mouthpiece and earpiece carry particularly high bacterial loads. Wipe both ends and the handset body with an isopropyl alcohol cloth.
Monitor: Use a screen-safe cleaner on a clean microfibre cloth. Wipe the screen gently in circular motions. Never spray liquid directly onto a monitor screen.
Step 7 — Clean the Desk Chair
Your chair gets as much contact as the desk — arguably more, since you sit in it for hours. Wipe all armrests thoroughly, as these collect skin oils and hand contact throughout the day. Wipe the backrest where your back and shoulders contact it. If you have a fabric chair, vacuum the seat pad. If you have a leather or vinyl chair, wipe the seat, back and sides with a damp cloth.
Step 8 — Wipe the Desk Legs and Base
Most desk cleans stop at the surface. The legs, base panels, and cable management areas underneath the desk accumulate dust, cable debris, and forgotten items that affect the overall hygiene of the workspace. Give the legs a quick wipe and remove any accumulated debris from the floor area directly underneath.
Step 9 — Put Things Back Intentionally
Do not just put everything back where it was. Place items back on the desk deliberately — the things you use most in the most accessible positions, everything else stored rather than displayed. Leave just the tools that help you do your best work. A clear desk surface is easier to maintain clean than a cluttered one.
How to Clean Different Desk Materials
The cleaning method in Section 3 works for all desk types, but the products you choose in Step 4 need to match your desk material. Using the wrong product damages the surface permanently.
How to Clean a Wooden Desk
Wood is the most popular premium desk material and the one that is most commonly damaged by incorrect cleaning. To protect the finish of wood, moisture control and gentle cleaners are required.
Use: Mild dish soap diluted in warm water — a few drops in a bowl, applied to a cloth that you then wring out until barely damp. Wipe the wood in the direction of the grain. Dry immediately with a clean cloth — never leave moisture sitting on wood.
What to use for conditioning: After cleaning, apply a small amount of furniture polish or beeswax paste to a clean cloth and work it into the wood surface in circular motions. This protects the finish, restores some lustre, and makes the surface easier to clean next time.
Avoid: Bleach, ammonia, vinegar, acidic cleaners, and soaking the surface with water. All of these strip the wood finish, raise the grain, or cause irreversible discolouration.
For stubborn marks on wood: A pencil eraser removes many surface scuffs on wood without damaging the finish. For sticky residue, a small amount of olive oil on a cloth works well — apply, let it sit for two minutes, then wipe away with a damp cloth.
How to Clean a Glass Desk
Glass desks look stunning when clean and terrible when they carry fingerprints, smears, and dust. The good news is that glass is one of the easiest desk materials to clean. The challenge is getting a streak-free finish.
Use: An ammonia-free glass cleaner sprayed onto a microfibre cloth — not onto the glass directly. Wipe in straight overlapping strokes. Use a second dry microfibre cloth to buff the surface immediately after wiping. The buffing step is what produces a streak-free finish.
Avoid: Ammonia-based glass cleaners — these can damage glass coatings and tinting. Paper towels — these leave lint and micro-scratches on glass. Abrasive cleaners of any kind.
For fingerprints between cleans: A lightly dampened microfibre cloth wipes fingerprints from glass without any product needed.
How to Clean a Laminate Desk
Laminate is the most common modern desk material — the surface you find on most flat-pack and office furniture. It is durable and tolerant of cleaning products, but harsh chemicals can lift the laminate layer over time.
Use: A standard disinfectant wipe, or a mild soap-and-water solution on a microfibre cloth. Disinfectant wipes are particularly convenient for laminate desks because the surface dries quickly and tolerates most standard cleaning agents.
Avoid: Bleach-based products used repeatedly — these can discolour laminate over time. Abrasive scrubbing pads — these scratch the surface permanently.
For sticky residue on laminate: Apply foaming shaving cream directly to the sticky area, work it in gently, leave it for 10–15 minutes, then wipe away with a damp cloth. This removes adhesive residue, crayon marks, and most surface staining from laminate.
How to Clean a Standing Desk or Height-Adjustable Desk
Standing desks often have a larger surface area and a mechanical or electric lift mechanism. Clean the surface using the method appropriate for the desk material above. Wipe the lift mechanism housing, the control panel, and the legs down with a damp cloth. Check the area around the cable management channel, which accumulates dust faster than most people expect.
How to Clean a Desk with Stains
Different stains need different approaches. Applying the wrong treatment first can make the stain significantly harder to remove.
| Stain Type | Best Treatment | Avoid |
| Coffee or tea | Blot immediately with cold water, then mild soap solution | Hot water — it sets the tannin |
| Ink | Isopropyl alcohol on a cloth, dabbed — not rubbed | Water first — it spreads ink |
| Grease or food oil | Dish soap solution — dish soap cuts grease effectively | Scrubbing immediately without pre-soaking |
| Sticky residue (adhesive, tape) | Olive oil or coconut oil on a cloth, left to soften, then wiped | Harsh chemical solvents on wood |
| Crayon or wax | Foaming shaving cream applied and left 15 minutes, then wiped | Scraping with a metal tool |
| Mould spots | White vinegar on a cloth, left 5 minutes, then wiped dry | Bleach on wood — damages finish |
| Water rings on wood | Wood furniture oil or mayonnaise (yes, really) applied and left overnight | Water — adds more moisture to the problem |
The universal rule for stains: blot, do not rub. Rubbing spreads the stain and pushes it deeper into the surface or surrounding material. Press and lift, rotate to a clean section of the cloth, press and lift again.
How to Clean Your Desk and Chair Together (The Full Workspace Reset)
Cleaning your desk and chair together — rather than separately — gives you a complete workspace reset. Here is how to do both efficiently without doubling the time.
The sequence that works:
- Clear the desk surface completely and move your chair away from the desk
- Dry dust the desk, then clean the surface and drawers as described in Section 3
- While the desk surface air dries, clean your chair — armrests, backrest, seat pad or cushion, chair legs and casters
- Run a vacuum or damp cloth around the floor area under the desk while you still have the chair pulled out — this area collects debris from both surfaces and rarely gets cleaned
- Wipe the desk legs and base before pushing the chair back in
- Put desk items back intentionally, roll the chair to your preferred position
The whole sequence takes 20–25 minutes for a thorough desk and chair clean — done monthly, it maintains a genuinely hygienic workspace without requiring a significant time investment.
Chair casters: Casters collect hair, thread, and debris that stops them rolling smoothly. Use scissors or a seam ripper to cut away accumulated material from around the caster axles, then wipe the caster body with a damp cloth.
Daily, Weekly, and Monthly Desk Cleaning Routine
We recommend putting your desk through a comprehensive deep clean at least once a month, while applying some of the easier steps — such as disinfecting your keyboard and mouse — on a bi-weekly basis.
Here is a practical cleaning schedule that keeps your desk consistently clean without taking time away from productive work.
| Frequency | Tasks | Time Required |
| Daily (end of workday) | Clear the surface, put papers away, wipe mouse and keyboard with disinfectant wipe, place stationery back in holders | 3–5 minutes |
| Weekly | Full surface clean with appropriate product, disinfect all high-touch surfaces, wipe phone handset, clear drawers of any non-essential items | 10–15 minutes |
| Monthly | Full desk and chair clean as described in this guide, clean monitor screen, empty and wipe all drawers, vacuum or wipe chair seat and back, clean desk legs and base | 20–30 minutes |
| Quarterly | Deep declutter — review all desk items and storage, clean cable management, dust under monitor and any desk accessories, replace keyboard covers if used | 45–60 minutes |
The end-of-day three-minute clear is the single most effective habit you can build. When your clean desk routine is gentle and regular, you protect your time, sharpen your focus, and reduce friction before it builds. When you arrive at a clean desk each morning, you start the day in a clear mental state rather than immediately managing the previous day’s unfinished business.
How to Prevent Your Desk from Getting Dirty
The best desk clean is the one you do not have to do — because you built habits that prevent build-up in the first place. Here are the most effective prevention strategies.
Use a Desk Mat
A desk mat protects the surface from scratches, absorbs moisture from cups and glasses, and gives you a dedicated zone for your keyboard and mouse that is easy to remove and clean separately. Desk mats take the wear that would otherwise go directly onto the desk surface.
Keep a Lidded Drink Container
Open cups and glasses are the single biggest source of liquid spills and ring marks on desk surfaces. A lidded coffee cup or water bottle eliminates this risk entirely and keeps your desk surface cleaner by default.
Eat Away from Your Desk
The most effective way to keep food debris off your desk is to eat elsewhere. Office desks that double as dining surfaces collect crumbs in every crevice — between keyboard keys, around the monitor base, and in the corners of the desk surface — that attract bacteria and pests. If you cannot avoid eating at your desk, use a plate rather than eating directly from packaging, and wipe the surface immediately after finishing.
Keep a Packet of Disinfectant Wipes in Your Drawer
A packet of wipes in the top drawer creates zero friction for daily surface maintenance. When you finish a call, wipe your phone. When you stand up for a meeting, wipe your keyboard and mouse. Two wipes and 90 seconds, every day, maintains a level of desk hygiene that a weekly clean cannot achieve on its own.
Use Cable Management
Cables lying across the desk surface create obstacles for cleaning and collect dust underneath them. A simple cable tray, cable clips along the back of the desk, or cable ties that bundle cords together make the desk surface much easier to wipe down and significantly reduce the dust accumulation that tangled cables cause.
Implement the One-Touch Paper Rule
Separate items into piles depending on what can be kept on the desk and what needs to be stored elsewhere. Once sorted, move on to cleaning the workspace.
Apply a stricter version of this every day: handle every piece of paper once. When it arrives on your desk, decide immediately — action it, file it, or bin it. A paper that sits in a pile is a paper you will handle multiple times without ever dealing with it, and a pile of papers is the fastest way to make a clean desk look cluttered within 48 hours.
The Benefits of Keeping Your Office Desk Clean
It is easy to know you should keep your desk clean and still not prioritise it. Here is why it is genuinely worth the time investment.
Fewer sick days. The keyboard, mouse, and phone handset that you touch constantly are among the highest-bacteria surfaces in any office. Regular disinfection of these surfaces reduces your exposure to the pathogens that cause common colds, gastrointestinal illness, and influenza. In a shared office environment, this is particularly significant.
Better focus and output. Princeton University research found that physical clutter competes for your attention and reduces cognitive performance. A clean, organised desk removes visual competitors for your focus and lets you direct your attention at the task rather than the environment around it.
Longer-lasting furniture and equipment. Dust that enters keyboards, monitors, and printers causes mechanical and electronic failure. Surface scratches from abrasive particles under improperly cleaned cloths damage desk finishes permanently. Regular, correct cleaning extends the life of both.
A more professional appearance. Whether you work from an office or your home with video calls, the state of your desk communicates something to everyone who sees it. A clean, organised desk signals competence and attention to detail.
Lower stress. A messy desk creates a low-level, persistent sense of unfinished business — because the visual disorder signals disorder to your brain. A clean desk creates a sense of control and readiness that affects your mood and confidence throughout the day.
Why you choose MS Clean?
Ms Clean has delivered professional office cleaning services to businesses across Adelaide since 2015. We clean offices, medical centres, law firms, recruitment agencies, aged care facilities, gyms, restaurants and more throughout Adelaide CBD and all metro suburbs. Desk cleaning is a core component of every commercial office cleaning service we provide and the guidance in this article reflects real experience cleaning thousands of Adelaide desks across every material type, desk design, and office environment. The advice here is practical, specific, and based on what actually works in a real office — not recycled tips from generic content farms.
FAQs:
How do I clean an office table?
Clear everything off the surface first, then dry dust with a microfibre cloth to remove loose debris. Apply the right cleaning solution for your desk material to a cloth — not directly onto the surface — and wipe the entire surface in smooth overlapping strokes. Clean the drawers, wipe the legs and edges, then clean any electronics before putting everything back. For laminate desks, a disinfectant wipe works well. For wooden desks, use a mild soap solution on a barely damp cloth and dry immediately.
How often should you clean your work desk?
You should do a quick wipe-down of your keyboard, mouse, and desk surface at least once a week — daily if you eat at your desk or share it with others. A thorough deep clean covering all surfaces, drawers, electronics, and your chair should happen monthly. Apply the easier steps — such as disinfecting your keyboard and mouse — on a bi-weekly basis, and do a comprehensive deep clean at least once a month.
What should I use to clean my wooden study table?
Use a mild dish soap diluted in warm water, applied to a microfibre cloth that you wring out until it is barely damp. Wipe in the direction of the wood grain and dry the surface immediately with a clean dry cloth — never leave moisture sitting on wood. For conditioning and protection, apply furniture polish or beeswax paste after cleaning. Avoid bleach, ammonia, and acidic products — these damage the wood finish permanently.
How can I keep my desk clean of papers?
Apply the one-touch rule — when a piece of paper arrives on your desk, decide immediately whether to action it, file it, or bin it. Never put a paper in a pile to decide later. Keep a filing system close to your desk — a simple tray system or small filing cabinet — so papers have a home within arm’s reach. Go through everything on your desk surface at the end of each week and file or remove anything that does not need to be there.
How do you clean a wooden desk?
Wipe the surface with a barely damp microfibre cloth dampened with a mild soap-and-water solution. Work in the direction of the wood grain, not against it. Dry the surface immediately with a second clean cloth — moisture sitting on wood causes swelling and finish damage. For conditioning, apply furniture polish or beeswax after cleaning. For sticky or marked areas, avoid harsh chemicals and try olive oil on a cloth for adhesive residue, or a pencil eraser for minor surface scuffs.
What are the benefits of keeping your office desk clean?
A clean office desk reduces your exposure to bacteria and germs, improves your focus by removing visual clutter that competes for your attention, extends the life of your desk surface and electronics, creates a more professional impression on colleagues and clients, and reduces the low-level stress that physical disorder creates. Research on workspace environment consistently links clean, organised work surfaces with better cognitive performance and lower self-reported stress levels.
How do I prevent my desk from getting dirty?
Use a desk mat to protect the surface from scratches and liquid marks. Keep a lidded drink container instead of open cups. Eat away from your desk when possible. Keep a packet of disinfectant wipes in your drawer for quick daily wipe-downs. Implement cable management to remove the dust traps that tangled cables create. Handle papers once rather than building piles. A three-minute clear at the end of each workday prevents the accumulated clutter that makes weekly cleaning feel like a significant task.
How do you clean a table and chair together?
Clear the desk surface completely and pull the chair away from the desk first. Clean the desk surface and drawers as described in this guide. While the surface dries, clean your chair — armrests, backrest, seat surface, and legs. Vacuum or wipe the floor area under the desk while the chair is out, as this area collects debris from both surfaces. Clean the desk legs and base before rolling the chair back into position. Doing both together takes 20–25 minutes and produces a complete workspace reset rather than a partial clean that leaves hygiene gaps.
Actionable Takeaways
Take these seven points away from this guide and implement them this week.
- Buy a pack of microfibre cloths. Two or three cloths make every cleaning step faster and more effective than any other single purchase. Use one for dusting, one for cleaning solution, one for drying or buffing.
- Check your desk material before you buy cleaning products. The right product for laminate damages wood. The right product for glass is wrong for everything else. Match the product to the surface.
- Apply cleaners to the cloth, never to the desk surface. This single habit prevents liquid damage to wood, avoids over-saturation, and gives you control over how much product you use.
- Start a three-minute end-of-day clear. Put papers away, return stationery to holders, clear cups and glasses, wipe the mouse and keyboard with a disinfectant wipe. Three minutes, every day. It is the habit that makes monthly deep cleans easy rather than overwhelming.
- Clean your keyboard and mouse more often than you think you need to. These are the highest-bacteria items on your desk. Clean them weekly at minimum, twice weekly if you share a desk.
- Deal with spills immediately. A spill cleaned within 30 seconds is a five-second job. A spill left for an hour is a stain treatment. A spill left for a day on wood is potentially permanent.
- If you work in an Adelaide office and want your team’s desks consistently cleaned to a professional standard — without managing it yourself — Ms Clean provides fixed-price, scheduled office cleaning services across all Adelaide metro suburbs. One service covers the desks, floors, kitchen, bathrooms, and everything in between.
Final CTA
Your desk is where you spend most of your working day. It deserves more than a quick wipe when someone is coming to visit.
If your Adelaide office needs a professional cleaning service that covers workstations, desks, high-touch surfaces, kitchens, and bathrooms on a scheduled basis — with the same staff every visit and a fixed price confirmed before we start — Ms Clean is ready to help.
Call Now
Ms clean Au
Address: 71 Alexandra Street, Prospect, SA-5082
M : 0480 321 027
E-Mail: contact@msclean.au